A Complete Guide to Mastering Drupal
Numerous high-profile websites for large enterprises such as Nokia, Pfizer and The Emmy Awards are created using Drupal. What makes Drupal so suitable for these organizations, you might ask? For starters, Drupal excels in providing a secure, customizable and scalable content management system (CMS).
Behind this robust platform is a vibrant, dedicated global community of developers. These passionate individuals contribute to the platform's development and offer extensive support to fellow users.
The community also aids in creating accessible web environments. Take it from Jim Alberque, GIS and Emerging Technology Manager at The City of Raleigh:
“Moving to Drupal has given us a great opportunity to leverage additional tools to consistently move the needle on providing better accessibility services.”
So, whether you're looking to build a Drupal website that can scale with your business, enhance your site's security or improve accessibility for all users, this guide will cover everything to get you started.
Installing Drupal Core With the Umami Profile
It's one thing to read about the capabilities of Drupal; it's another to create, modify and manage content yourself.
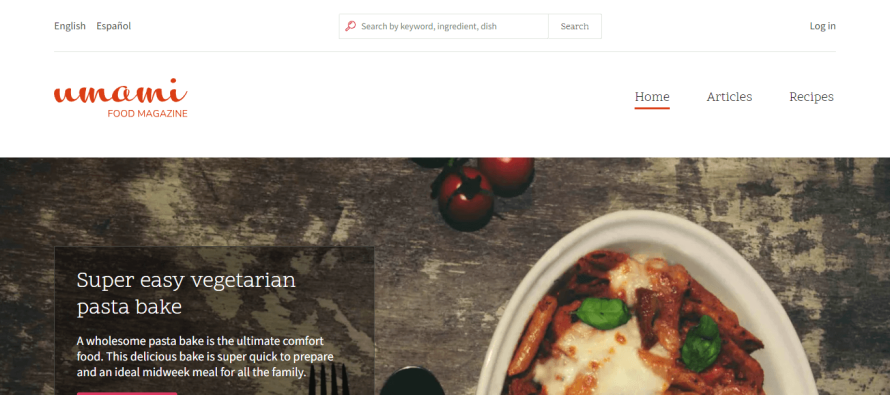
The Umami Food Magazine is Drupal’s demo profile – designed specifically for those eager to experiment with real Drupal features. Users can gain immediate access to a fully functional Drupal site, complete with content types, fields and views that demonstrate the power and flexibility of the platform. This hands-on experience is invaluable, allowing users to interact with Drupal's features in a live environment.
Through Umami, you'll learn the ins and outs of Drupal's administrative interface, understand how content is structured and get a feel for the extent of customization available at your fingertips. The process of getting started with Drupal and the Umami profile is incredibly straightforward, especially if you're working with a hosting provider that specializes in Drupal, such as Pantheon.
Pantheon automatically provisions the infrastructure needed for Drupal to streamline the installation process. With just a few clicks, you can have a Drupal environment ready to go, letting you focus on exploring Drupal's features rather than dealing with installation hurdles. Here’s how:
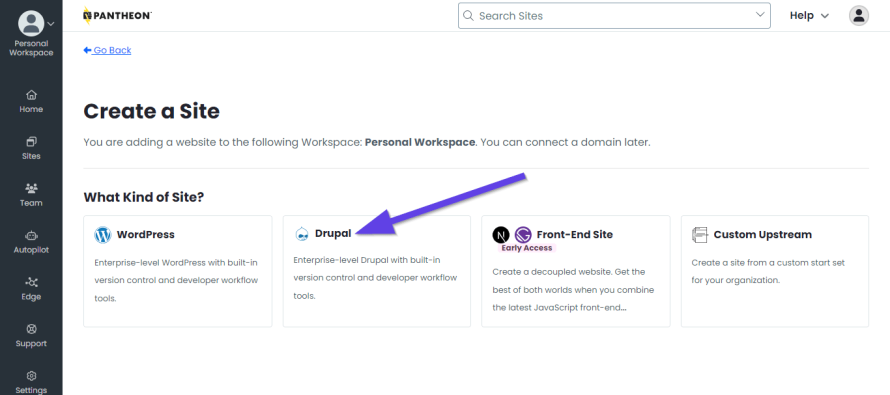
Create an account on Pantheon (you can start for free!) and click on the Drupal option when creating a site.
Image
Choose the latest Drupal version.
Image
0411.png?itok=c9hItiwG)
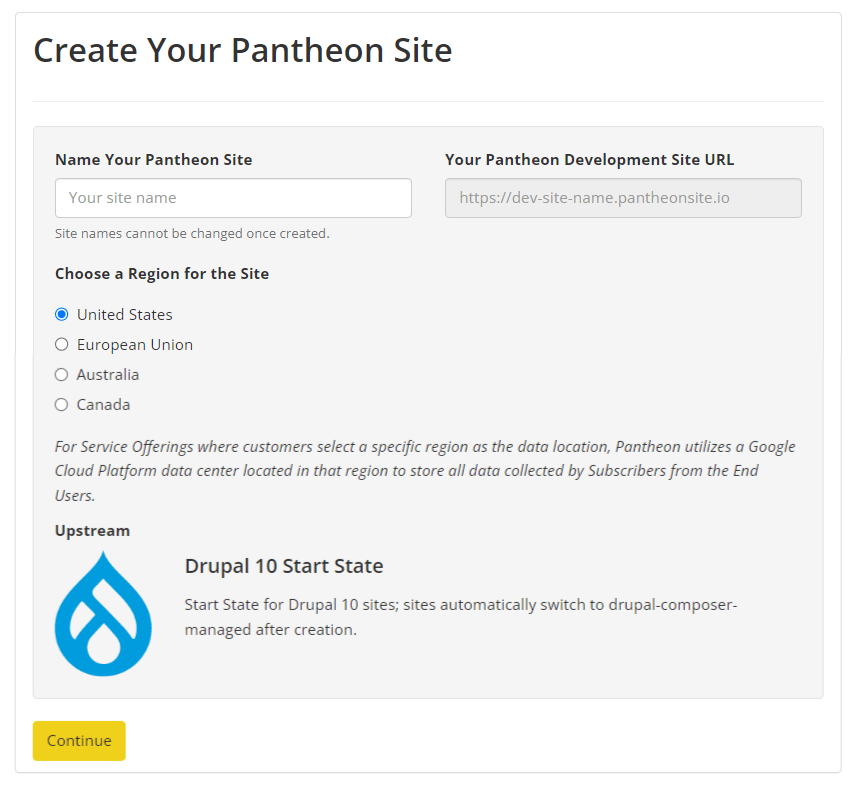
Now enter a name for your Drupal website, select its region, then click Continue.
Image
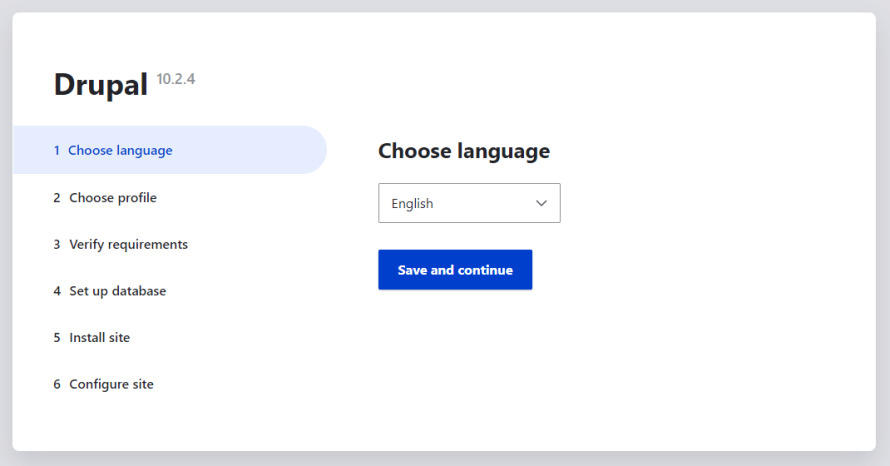
Click on Visit Development Site and choose the language.
Image

Image
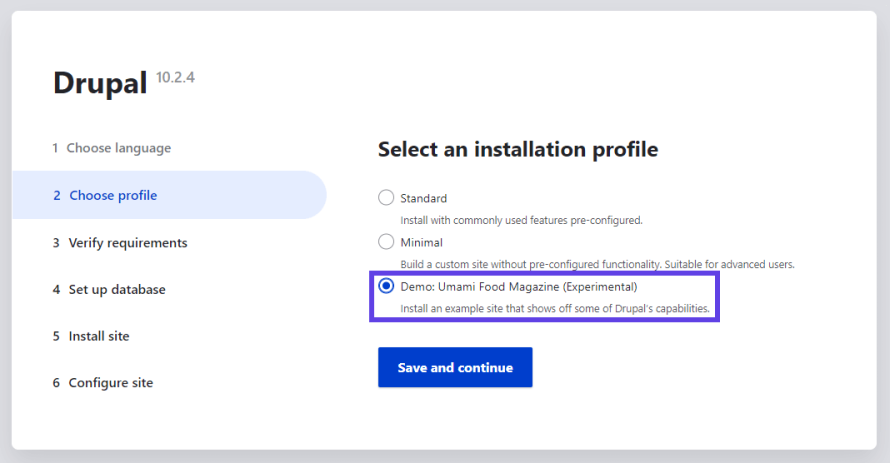
Select the Demo: Umami Food Magazine (Experimental) option, then click Save and continue.
Image
Enter the required information to configure your Drupal website.
Image

And that’s it. That’s how easy it is to set up and get started with Drupal and the Umami demo.
Image
However, if you're going the manual route or your hosting provider doesn't offer automatic Drupal setup, fear not. Installing Drupal manually is a well-documented process that brings its own set of learning opportunities. Remember to select Demo: Umami Food Magazine (Experimental) on the installation profile page during the Drupal installation process.
After experimenting with Umami and getting a taste of what Drupal can do, you might find yourself ready to start building your own site. When you’re ready, choose Standard as the profile instead of Demo: Umami Food Magazine (Experimental) during the Drupal installation process. This selection sets the stage for you to build your own site from the ground up, applying the insights and experience gained from your time with Umami.
Whether you're exploring, experimenting or ready to embark on building your own digital presence, Drupal provides the tools and flexibility needed to create websites that meet your specific needs and vision. The Umami profile is your first step into this world, offering a hands-on introduction to the powerful features and capabilities that make Drupal a top choice for web developers and content managers worldwide.
Understanding Drupal’s Interface
Navigating the Drupal interface is a fundamental step in mastering this robust CMS. Understanding how to move through the admin area efficiently will greatly enhance your productivity and ease of use.
Accessing the Backend
To access the backend of your Drupal site, simply navigate to https://yourdomain.com/user/login. Replace yourdomain with your actual domain name. You’ll be prompted to enter the login details you established during the Drupal installation process.
Image
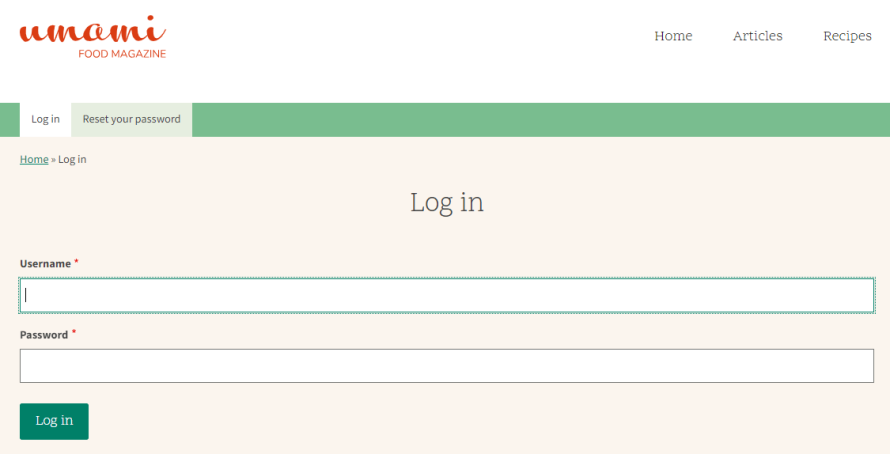
Once authenticated, you'll be welcomed into Drupal's admin area, where content creation and site management happen.
Top Bar Overview
At the top of the admin area, you'll find a navigation bar designed to facilitate easy movement around the backend and to the front end of your site.
Image
Here's a quick guide to what each button on the top bar does:
- Back to site: This handy link allows you to quickly switch from the back-end admin area to the front-end of your website, enabling you to see the changes you've made in action.
- Manage: Toggling this button will show or hide the main bar, serving as your gateway to all the administrative functions Drupal offers.
- Shortcuts: This menu can be personalized with links to frequently accessed areas of the backend, streamlining your workflow by reducing the time it takes to navigate the interface.
- Username: Clicking on your username allows you to edit your current user profile, adjusting settings such as your password, email address and more.
Navigating Around Drupal's Dashboard: The Main Bar
Image
The main bar appears when you click on Manage in the top bar. It shows a comprehensive menu that serves as your navigator through Drupal's extensive features:
- Content: This section is the heartbeat of your site, where you'll create pages and articles. It's also where you manage comments and view files that have been uploaded.
- Structure: Here, you can organize your site's architecture by managing menus, contact forms and site taxonomy, as well as configuring blocks to customize how content is displayed.
- Appearance: This area allows you to manage and install themes, changing the look and feel of your site with just a few clicks.
- Extend: This is where you'll find and manage Drupal modules, adding new features and functionalities to your site.
- Configuration: Dive into the site settings menu here to fine-tune your site's configuration, from basic information to more advanced settings.
- People: Managing user access to your site is done in this section, where you can assign roles, set permissions and ensure your site is accessible to the right people.
- Reports: Stay informed about your site's health and updates with access to logs, update reports and problem notifications.
- Help: Provides access to Drupal's comprehensive help resources, from documentation to community forums.
Mastering Content Management in Drupal
One of Drupal's strongest features is its robust content management capabilities that are designed to accommodate a wide range of content needs and preferences. Let’s see how to effectively create and manage content on the Umami demo website, focusing on Pages and Articles.
Drupal offers two primary content types:
- Pages are typically used for static content that doesn't change often, such as the About Us or Contact pages.
- Articles are used for timely content like news updates, blog posts or any material that benefits from being organized chronologically.
In addition to these two, Drupal provides the flexibility for modules to provide content types or for site administrators to define their own. These content types can cater to specific content management needs, further extending Drupal's versatility. Whether you need a portfolio, a forum or a custom content type, Drupal’s modular design allows for this expansion.
Managing content in Drupal starts with understanding how to create and manage pages. Here’s how to create a new page in the Umami demo:
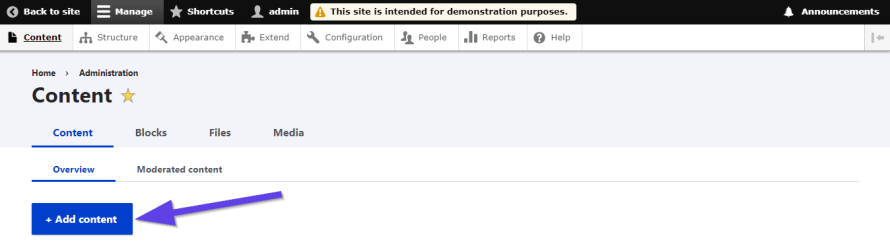
- Click on Manage in the top bar and select Content.
Click on the Add content button, then select Basic page from the list of available content types.
Image
Image
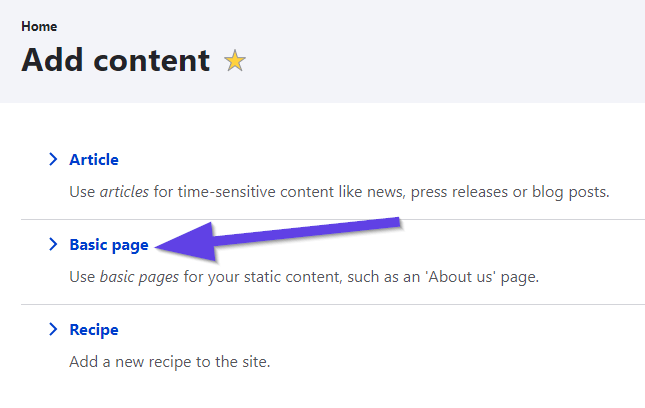
You’ll be presented with a form to fill out your Page’s details, such as the title and body content. You can also specify the URL alias for your page, making it easier for users and search engines to understand what the page is about.
Image
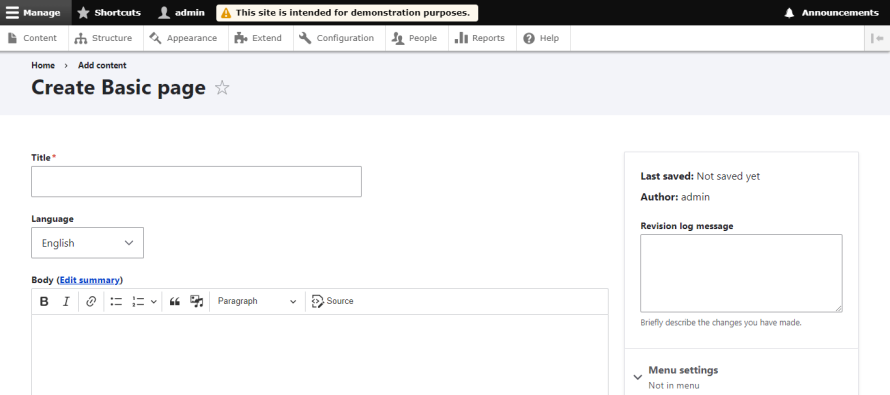
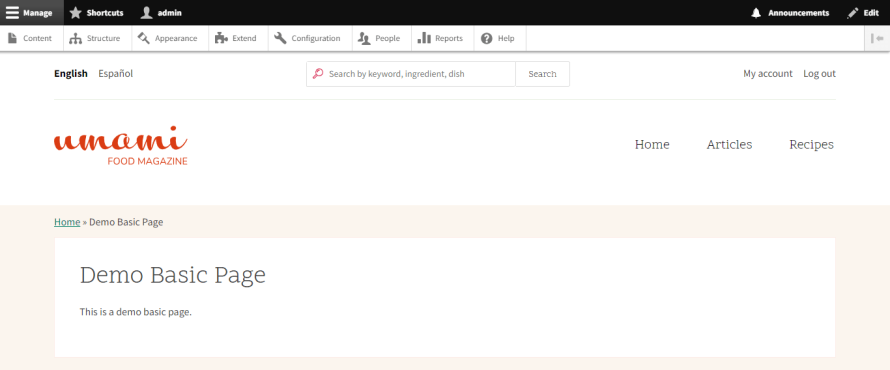
Once you’re satisfied with the content, you can save and publish your new page, making it accessible to your site's visitors.
Image
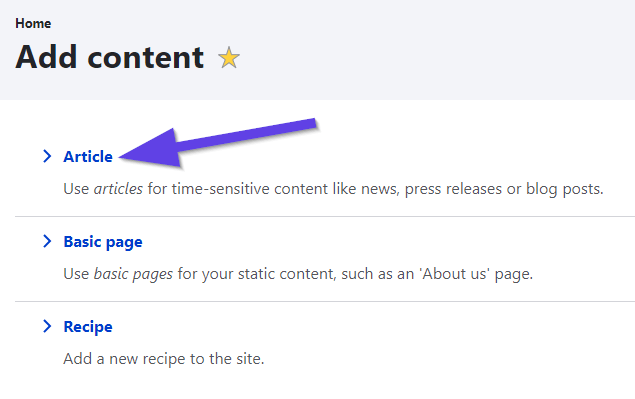
Creating an article in Drupal follows a similar process to creating a page but with a few additional steps. From the Content section, select Add content and then choose Article.
Image
Enter the necessary details for your article, such as title and body copy.
Image
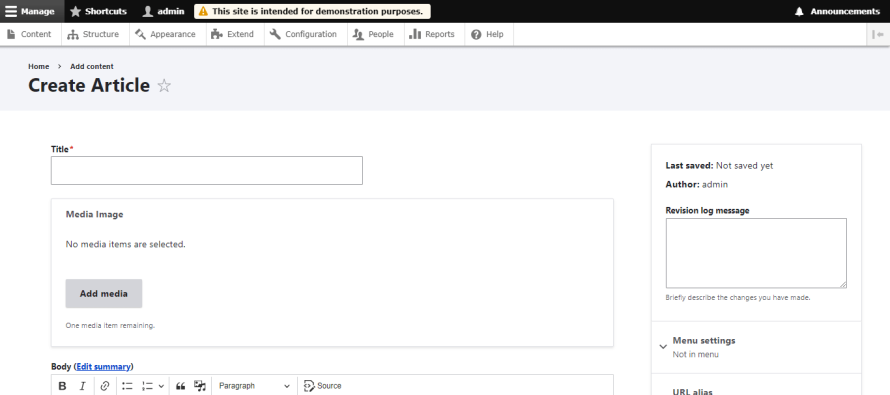
Here’s where the similarities with Pages end and the specialized article settings begin:
- Tags: Articles allow you to add tags, facilitating better organization and navigation through related content across your site. "Tags" are one implementation of Drupal's broader concept of Taxonomies.
- Featured Image: You can set a featured image for your Article, adding a visual element that can attract more attention to your content.
- Comment settings: Decide whether you want to enable comments for your Article, allowing visitors to engage with your content directly.
And you’re done!
Features of Drupal Core
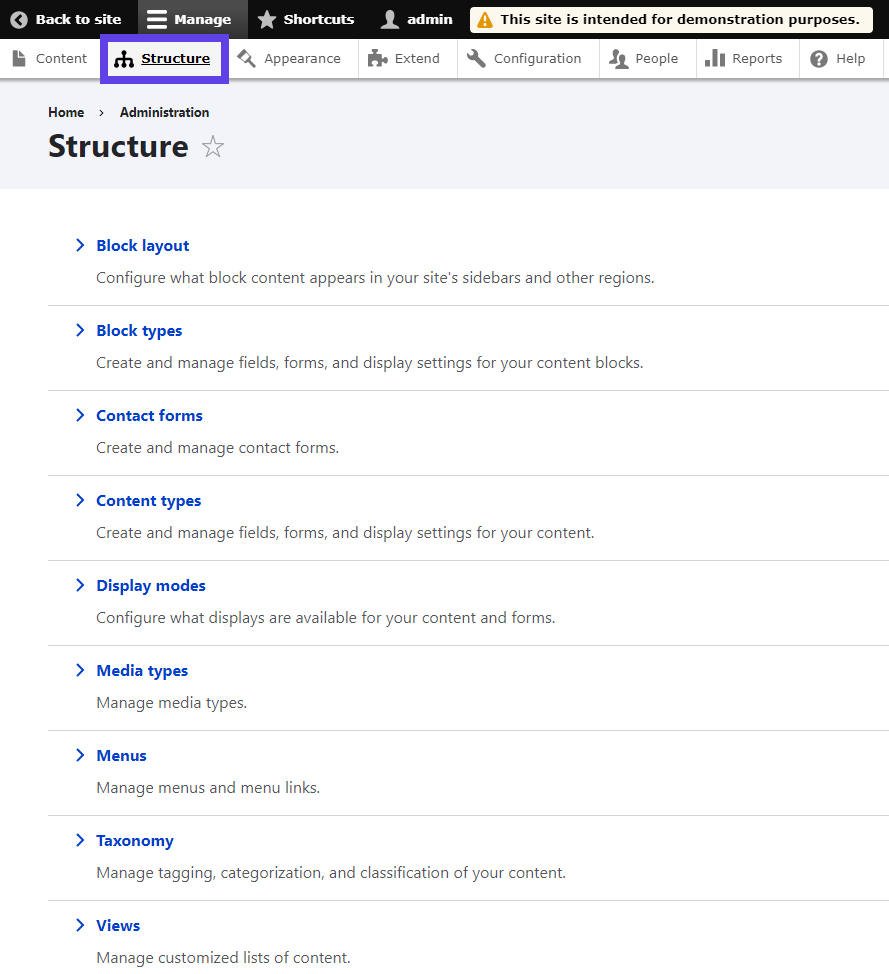
Drupal's core is packed with powerful features that make it one of the most flexible and extensible CMSs available today. It provides a comprehensive suite of tools for building and managing dynamic websites. You can access these settings through the Structure tab.
Image
Fields / Content Types
Fields or content types in Drupal are categories of data that can be attached to content types, users, comments and other entities. Common examples include titles, body texts, comments, tags and images. The ability to add and customize fields is what makes content types so versatile in Drupal.
Image
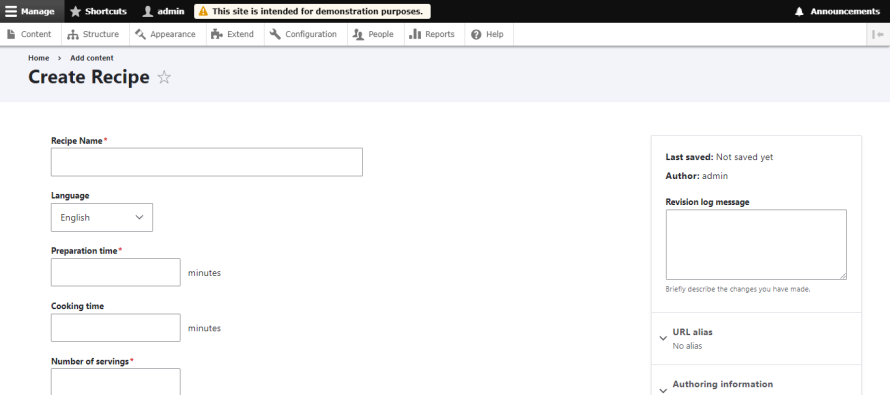
Within Umami, you'll find content types like Recipe or Article, each with custom fields tailored to specific content needs, such as ingredients, cooking time for recipes or tags for articles. This customization allows Umami to present a diverse range of content in a structured and meaningful way, showcasing Drupal's ability to handle complex content architectures with ease.
Blocks
Blocks are essentially containers for content or functionality that can be placed in various regions (like headers, footers and sidebars) throughout your site. A user login form is a classic example of a block that might be positioned in a sidebar or footer region.
Drupal's block system allows for a high degree of customization in how content is displayed and where giving site administrators the control to enhance the user experience by strategically positioning blocks across the site.
Image

Umami leverages Drupal's block system to enhance the site's layout and user experience. It utilizes blocks for features like the recipe search box, which is placed in the header or promotional content displayed in sidebar regions. This strategic use of blocks to distribute content and functionality throughout the site exemplifies how Drupal's block system can create engaging and user-friendly layouts.
Taxonomy
Taxonomies are used to organize, classify and group content together based on shared characteristics or attributes. This organization helps in managing and retrieving content more efficiently. The key components of taxonomies are:
- Terms: These are the individual labels or names used within a taxonomy to classify content. For example, in the context of the Umami demo site, terms could include “vegan”, “desserts”, “quick meals”, etc.
- Vocabulary: This is a collection or a set of terms that are related to each other in some way. Using the previous example, a vocabulary for Umami might be "Tags" or “Recipe Types”, which would include terms like the ones mentioned above.
Taxonomies help with:
- Content Organization: Taxonomies help in structuring the site content by categories and tags (or other custom types), making it easier for users to find related content.
- Navigation and User Experience: By classifying content into categories and tags, taxonomies improve the navigability of a website, enhancing the user experience.
- SEO: Well-organized content can contribute to better search engine optimization (SEO) by grouping related content together, which can help search engines better understand and rank site content.
- Content Filtering: Taxonomies allow for the creation of dynamic listings and filters for content, enabling users to filter content based on their interests or needs.
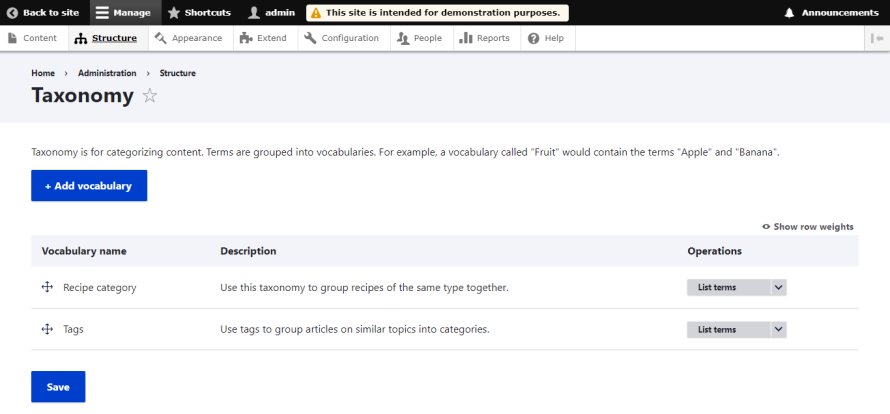
Here’s how you can edit your taxonomy:
Click on Taxonomy from the Structure tab. Here, you'll see a list of vocabulary terms, including those used in the Umami demo (e.g., Tags, Recipe Category).
Image

Image
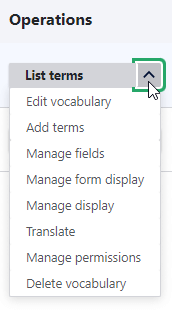
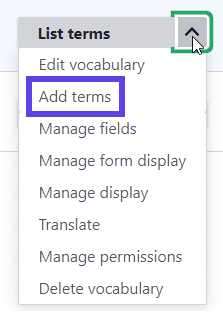
For any Vocabulary name, go to the List terms dropdown next to it and choose the action you want to do.
Image
- Make your changes to the term – edit the name, description or any other fields that are available – and then save your changes.
To add a new taxonomy term:
Click the Add term button at the top of the page.
Image
Enter the details for your new food-related taxonomy term. You'll need to provide a name for the term at least, but you might also want to include a description or upload an image if the vocabulary is set up to include these fields.
Image
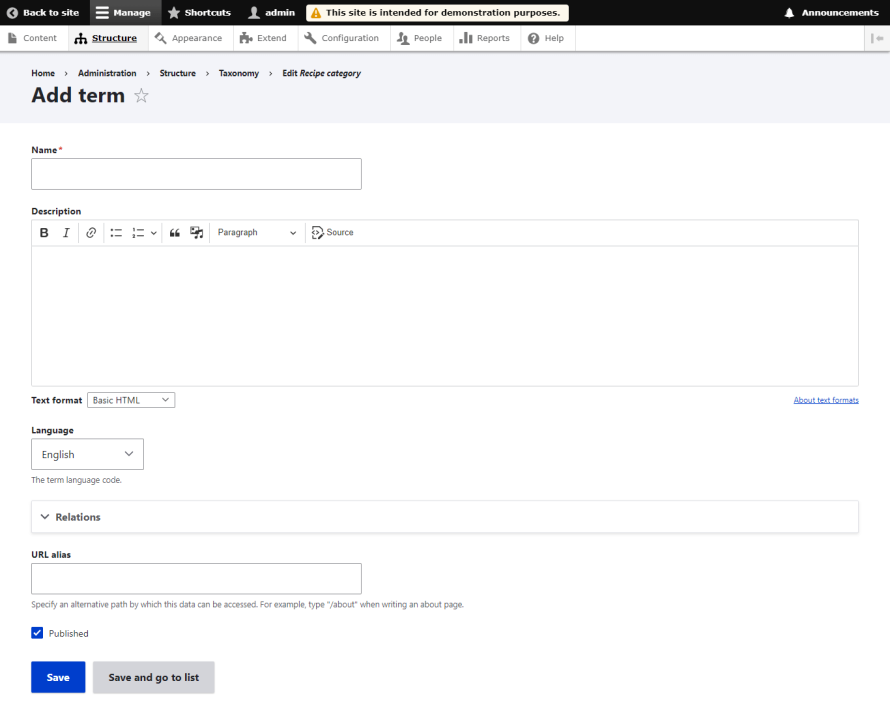
- Save the new term.
Views
Views are one of Drupal's most powerful features, enabling the creation of dynamic lists and reports from the content stored in the database – be it a page that lists all articles tagged with a certain term, a block that displays recent blog posts or a feed that aggregates content from multiple sources.
This tool provides a graphical interface for building complex queries to display content in various formats without requiring custom coding, greatly extending Drupal’s capabilities in data presentation and content management.
Image
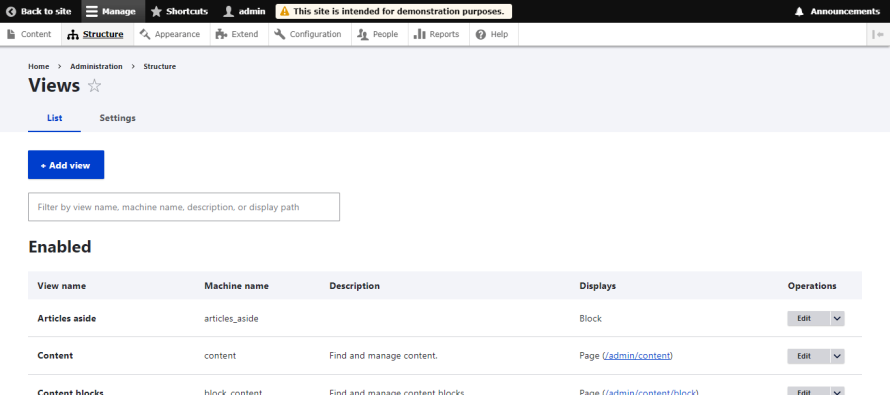
For example, Umami creates dynamic listings of recipes and articles, filtering content by categories or tags and presenting these lists in various sections and pages across the site.
Users / Roles / Permissions
Image
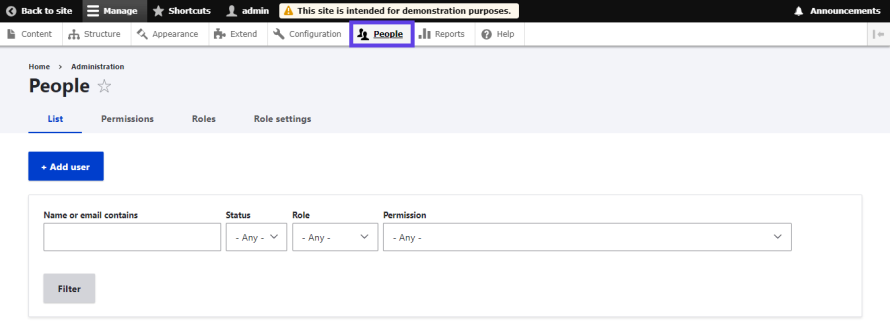
Drupal's user management system is built on the concepts of users, roles and permissions. Users are individuals who can log in to your site, roles are collections of permissions that can be assigned to users and permissions determine what users are allowed to do on the site. This system offers granular control over who can view, create, edit and delete content or perform administrative tasks, ensuring site security and operational integrity.
Multilingual
Image
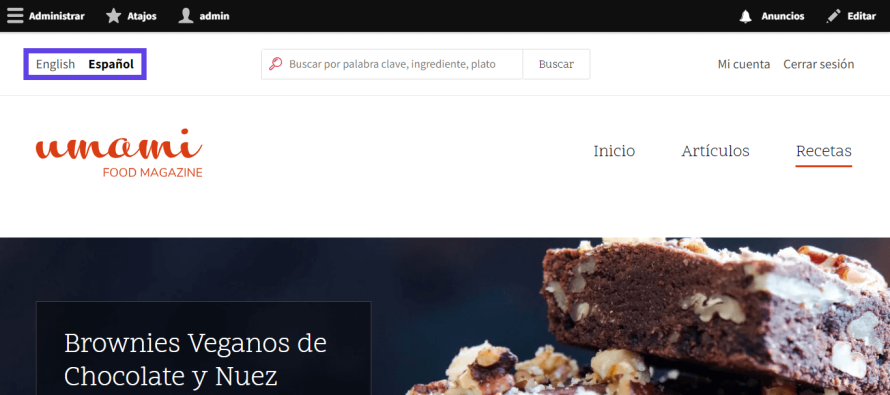
Drupal supports multilingual websites out of the box, allowing you to create content in multiple languages and manage language-specific configurations. This feature is essential for businesses and organizations serving diverse audiences.
Installing and Changing Themes
Themes in Drupal are a straightforward way to change the aesthetic of your site. They define the website's look and feel through styling and layout. Themes provide “regions”, which hold blocks, allowing you to arrange your site's components with flexibility. The majority of professional Drupal sites use custom themes, often expanding on a “base” theme.
When a theme is applied, everything on the site is rendered according to the templates provided by the theme. These templates follow a naming convention, allowing for specific overrides.
For example, the Umami theme includes a generic node.html.twig template and more specific overrides like node--article--full.html.twig for rendering a single full article. This system of template hierarchy enables developers to finely tune the presentation of content on their sites, from broad site-wide styles down to the styling of individual content types and fields.
Activating Core Modules in Drupal
Drupal's flexibility and extensibility largely stem from its modular architecture, which allows additional functionalities to be integrated easily into your site. Among these modules, core modules are integral parts of Drupal. They are pre-packaged with the system and only need activation. This ensures that essential capabilities are readily available without the need for external downloads or installations.
Apart from core modules, the Drupal ecosystem is enriched by thousands of contributed modules developed by the Drupal community. These contributed modules extend the functionality of Drupal sites beyond the out-of-the-box features, catering to a wide range of needs from SEO to social media integration. For needs that go beyond what's available in core and contributed modules, custom modules can be developed to provide tailored functionalities specific to your site's requirements.
Increasing Functionality With Contributed Modules
While the Umami demo provides a robust starting point for exploring Drupal, real-world applications often require additional functionalities to meet specific needs, such as improved SEO, user experience and content management. Here are some popular contributed modules that could be used on top of Umami to enhance its capabilities:
- Pathauto: This module simplifies the management of URL aliases for your content. For a food magazine like Umami, ensuring that recipe URLs are not only user-friendly but also SEO-friendly is crucial. Pathauto automates the creation of these URL patterns based on predefined settings, saving time and enhancing the site's navigability and search engine rankings.
- Metatag: The Metatag module is essential for any site focusing on SEO. It allows you to automatically provide structured metadata, such as titles and descriptions, for each page. This metadata is crucial for search engines to understand the content of your pages, improving your site's SEO performance.
- Redirect: Managing redirects is vital for maintaining SEO health, especially when updating or moving content around. The Redirect module makes it easy to manage 301 redirects, ensuring users and search engines are directed to the correct pages, thus preserving link equity and improving user experience.
- Field Group: As you add more fields to a content type, managing them can become unwieldy. The Field Group module helps organize fields in the backend, improving the content creation and editing process. This module is particularly useful in complex content structures where clarity and ease of navigation in the admin interface can significantly enhance productivity.
Next Steps: Maximize Your Drupal Site With Pantheon
As you start your journey with Drupal, consider taking your site to the next level with us at Pantheon. Recognized as a leading WebOps platform, we are the fastest hosting provider for Drupal, designed to amplify the strengths of Drupal with added performance, security and scalability.
We focus on enhancing the Drupal experience, adding layers of efficiency and streamlining the workflow for teams of all sizes. Our platform enhances Drupal's core benefits, providing a robust environment tailored for high-performance and effortless site management.
Additionally, Pantheon shines when it comes to facilitating collaboration across cross-functional teams with the Multidev feature. This allows developers to clone their live site's code, content and database to create independent development environments.
Take the first step towards maximizing your Drupal site by trying Pantheon for free today. Experience firsthand how Pantheon can transform the way you develop, manage and scale your Drupal site, ensuring your digital presence is not only robust but also future-proof!